Building a Pickleball Court
| July 11, 2023

Looking into building a pickleball court of your own? Let’s chat.
Pickleball is one of the fastest-growing sports. It’s easy to play, social, and lots of fun. Plus, it’s a great way to get some exercise, both inside and outside, and it’s great for all ages, as young players can share a court with older players. As public court availability has become increasingly precious, players are turning to new solutions to get their pickleball fix.
As it turns out, building a court has become wildly popular in recent years as a way to maximize playing time and convenience. If you’re considering building a court, you’re clearly addicted to pickleball.
If you want your own personal space to play, there are some things to keep in mind. Do you have everything in place, from your checkbook to your space? Let’s dive in and find out.
COSTS:
Costs can vary but expect to pay about $30,000–$50,000 per court. Your largest expense is going to be framing the court, prepping the court, and pouring the concrete (or you can go with asphalt). This cost is just an estimate. More bells and more whistles mean more cost to you. Be ready for it.
COURT MATERIAL:
Starting with the court itself, asphalt courts take less time to construct and are cheaper initially than concrete, but they may require more maintenance. Concrete is more durable, requires less maintenance, and will crack less. Courts on the level that the pros use cost about $5 per square foot.
Keep in mind that, before laying concrete or asphalt, you’ll need to have contractors come in to level the ground and lay a gravel base. The cost of this can be minimal if you have a flat surface to work with or significant if you have hills, trees, or other obstacles to contend with.
NETS:
A permanent net costs about $1,000+. The PPA Tour uses semi-permanent nets made by Selkirk Pickleball. Temporary or movable nets that you can put together and take apart before and after a playing session are definitely affordable and can cost as little as $100. Check out some of these net options from Pickleball Central. Permanent nets look a bit better and stand up to weather and elements longer, but that doesn’t mean a sturdy movable net won’t work just as well if you’re on a budget.
FENCING:
If you’re building an outdoor court, you may not require fencing, but a chain-link fence will cost you about $5,000. Fencing should be at least four feet high and padding should be applied to the top of the fence. If you want a fence that mimics what’s used at professional facilities, you’re looking at about a 10-foot high fence, which will cost you a good bit more. Remember, the pickleball itself doesn’t roll too far if it’s hit off the court, so if your court is surrounded on the sides or back by grass, fencing might not be something you have to account for.
SURFACING:
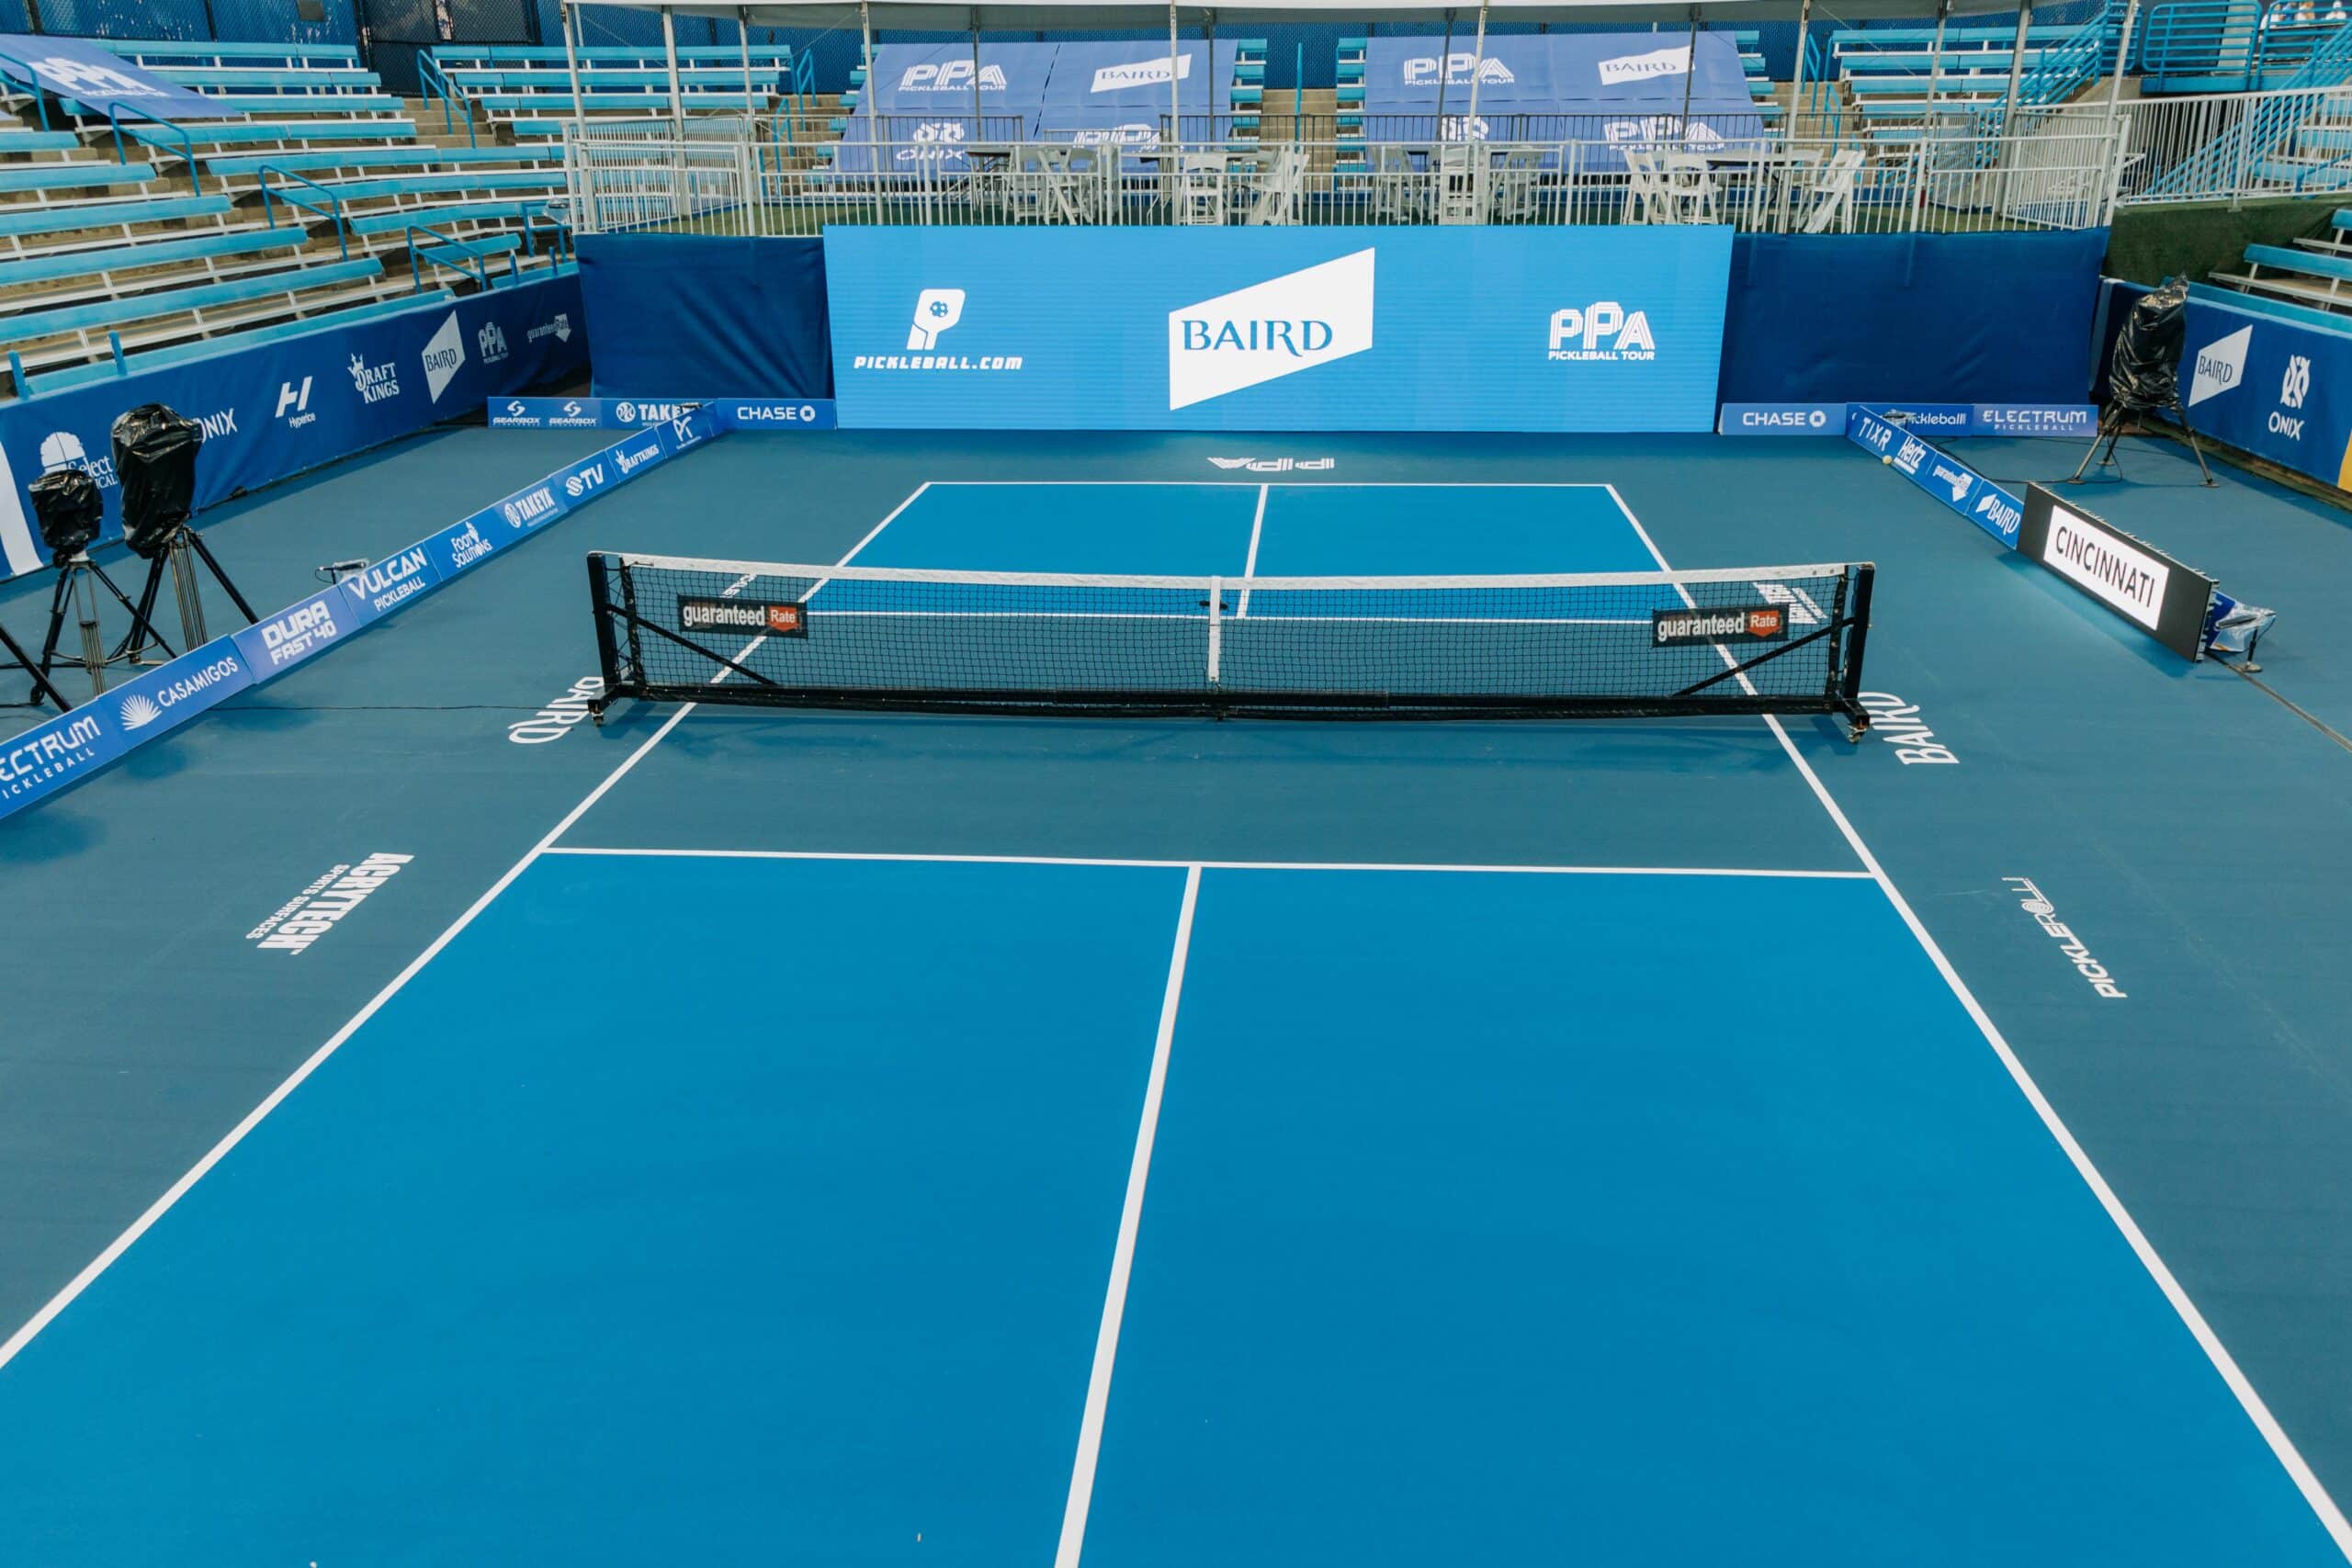
You’re definitely going to want proper surfacing, and doing that is certainly worth the money. It will make your court look professional, too. An acrylic “hard court” surface will be the least expensive and will perform the best. There are also surfaces made of snap-together plastic components.
Wherever the PPA Tour goes, it resurfaces its professional courts with premier sport surfacing designed by Acrytech. This ensures a consistent, world-class playing experience for the Pro Tour. Acrytech is a surfacing and resurfacing paint manufacturer for tennis, pickleball, and other sports and offers its coating solutions in a variety of colors. If you want a clean, perfect surface and highly exact lines, Acrytech is your safest bet. It is currently the best-in-class for sport surfacing options.
LABOR:
Obviously, you can watch plenty of videos and follow a number of tutorials, but consider hiring a professional to make sure your court looks as perfect as possible. Plan to spend about $7,000 for supplies, time, and labor for the surfacing part of the project.
LIGHTING:
Don’t forget about the lighting aspect of your court. LED lights are worth the money if you plan on playing after dark. An electrician is necessary for this part of the process. You’re likely looking at about $7,000 for lighting and potentially more if you need to bring power out to the court.
Now let’s get into the logistics.
COURT DIMENSIONS:
A standard pickleball court is 20 feet wide and 44 feet long, which is inclusive of 2 inch lines. If you want a court that complies with USA Pickleball’s standards, you will need space that extends beyond court lines. Even if your court is just for practice and fun games with family and friends, the proper amount of space beyond the end lines and sidelines is necessary for safety purposes.
An official USA Pickleball court requires five feet extra on the sidelines and another eight feet beyond the baselines. This makes the rectangle of space (court plus out-of-bounds area) 30 feet by 60 feet. For tournament play or a standalone court, 34 feet by 64 feet is recommended – numbers which are inclusive of all divisions: singles, doubles, and mixed doubles.
ROOFING:
If you’re building an indoor court, it is recommended to have a roof at no lower than 18-20 feet high to avoid issues with live balls coming into contact with the ceiling.
NET DIMENSIONS:
Pickleball nets are set at 36 inches high at the court sidelines and 34 inches in the middle. Often, nets don’t remain taut. If that’s the case, make sure to add a pole to the middle of the net to keep the net at the required 34 inches.
While the dimensions are similar in pickleball to badminton, a badminton net is five feet high. While that would be a fun and interesting variance, a badminton net should not be used for a formal game.
COURT ORIENTATION:
Don’t forget to think about the orientation of your court. Playing on a court that’s positioned north-south is best, that way no player ever has to deal with a rising or setting sun getting in the way of tough shots.
USA Pickleball has a wealth of information on designing your own court. Visit their website where you can buy a court construction manual for $29.95.
*The numbers quoted throughout this article are averages and can vary widely based on location and other factors. Applying for permits and using contractors for specific portions of the construction may also be necessary expenses to consider.*
EXPENSES AT A GLANCE:
- $9,000 = concrete court (30×60)
- $1,000 = grading + gravel lay
- $1,000 = net
- $5,000 = fencing
- $7,000 = surfacing
- $7,000 = lighting
- TOTAL = $30,000
QUICK CHECKLIST:
- Read the room: Determine if you have the space.
- Gear Check: Choose the type of materials you’d like to use.
- Get cozy: Pick out fencing, if you need it.
- Light it up: If you want to play at night, you’ll need to illuminate your court.
- Net gains: Figure out what kind of net you want, whether it’s permanent or temporary.
- 0-0-2: Serve it up!
ADDITIONAL INFORMATION:
Want more info on how to install your pickleball court? Let the experts help. Email us at courts@ppatour.com.


